Every summer my husband and I plant a tomato plant. We do this to enjoy the plump red tomatoes right off of the vine.

This summer we have had a problem, which is that SOMETHING IS EATING OUR TOMATOES AND IT IS NOT US!
The Beginning
Let me start from the beginning.
Purchase tomato plant
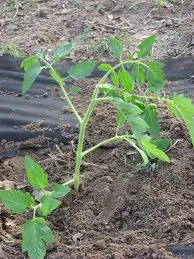
 We went to the garden center and purchased a nice healthy tomato plant.

Plant tomato plant
 We planted the tomato plant the proper way. We mixed some organic fertilizer in the soil. We sprinkled a little lime stone which we mixed in with the soil and fertilizer. We separated the soil and put the plant into the hole. We filled in with dirt up to the first leaves and gently pressed down. We made a slight indentation around the plant so the water would go to the roots.
Wait for tomatoes
During the waiting time for the first yellow blossoms to appear, we watched carefully for any type of insects or diseases.
- The most common insects are the hornworms, aphids, psyllids and flea beetle.


A safe insecticide can be purchased or you can home make an insecticide to rid your tomato plants of these culprits.
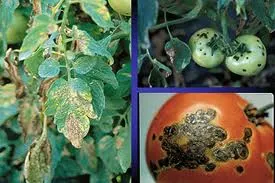
The most common diseases a tomato plant can get are Early Blight, Gray Leave Spot, Late Blight, Southern Blight and Verticillium Wilt. These are diseases that attack the foliage of the plant. Diseases that attack the fruit of the plant are Anthracnose, Bacterial Speck, Blossom End Rot, Buckeye Rot and Gray Wall.
These diseases can be controlled by removing affected areas. Unfortunately there is no treatment for any type of Wilt. For the Blights, it is suggested to put organic mulch under the plants to keep the disease from spreading. For the Rot, water the plants regularly through the dry periods and use a balanced organic tomato fertilizer with a 5-10-10 ratio of nitrogen, phosphorus and potassium.


- It is very important to stake or cage your tomato plant to keep it under control. If using a cage, it should be at least 48 inches tall. Place the cage over the tomato plant. We chose to use a cage.

- Small green tomatoes should appear in approximately 45 to 90 days depending on the area and the weather. Tomatoes need lots of sunshine. First there will be a little yellow flower and the tomato forms out of the center of the flower.


Tomatoes Ripen But Disaster Strikes
Within the 45-90 days our tomatoes started to ripen. At last there was one we could pick but on the side of the tomato was a terrible large space. As I checked the rest of the plant I found practically all of the tomatoes had similar markings.

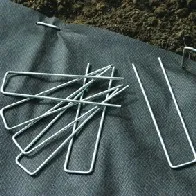
I went straight to the garden center and they informed me it was probably the big black crows which hover around the area. They recommended building a net tent to protect them. I left the garden nursery with a net, 6 bamboo poles, hooks to hold the net close to the ground and wire ties to attach the net.


Tips
- Put the four bamboo poles into the ground.
- Lay two bamboo poles across the the top and fasten with ties to the poles in the ground.
- Lay the bird net over the poles. (like a tent).
- Use the hooks to secure the net to the ground.
We picked off all of the bad fruit so we could see if our problem was solved. Guess what, it wasn't. We had even more tomatoes eaten the next two days.

 The right side (as you look at the plant) was totally eaten. This could not be birds. Back to the garden center I went and took a tomato and told them we had done everything they had told us to do. One of the men who worked at the nursery said he had the same problem. He asked if we had fruit and palm trees around us and I told him yes. He said he knew what it was...the culprit is rats! He sold me some poison blocks and assured me that the rats loved them. He said they die within three days after eating the poison. Well, it was either the tomatoes or the rats. We chose the tomatoes.

We placed seven blocks of poison around the plant. In the morning we could hardly wait to see if the pests had eaten their treat. We could not believe our eyes, they had eaten all nine blocks and no tomatoes were touched. We put seven more blocks out the next day and only 4 were eaten. I don't think it was just one rat, I think it was a pack of rats. We have not had anymore tomatoes destroyed nor have we found any dead rats. Hopefully they wondered off and died in the river bed.
The poison is called Tomcat Ultra Block Bait.
All Is Well
The rats are gone, the tomatoes are getting more blossoms and the green tomatoes are getting bigger and bigger. Hopefully this article will help someone with the same problem so you can enjoy big, ripe, red tomatoes.


Comments
Be the first, drop a comment!